![]()
 I get fairly excited when I find a good, Canadian pattern designer, being a Canadian myself. If you haven’t heard of her before now, meet Filles à maman, or FAM. I stumbled across FAM while on the hunt for a mitten pattern with an inset thumb (rather than the typical cookie cutter style). She has one of those too, here, and I will do a review on these later (their fantastic as well fyi). She now works for Jalie creating new patterns there which I think is fantastic, and shows how great of a designer she is. French is her first language, however she has replied to me in English and the majority of her patterns are in both French and English. I did not find the language barrier to be anything concerning, at all, and I am not great with French by any means. I really wish all of her blog posts were in English and French as well but sadly there are only a few. Her blog is really great too, and you can always use Google translate on the French only ones.
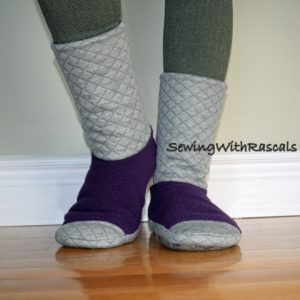
Now to the slipper pattern! The Stylish Slippers fit a wide range of sizes, children to adults. My 1 year old just fits into the smallest size and she’s wearing a size 4 US baby shoe. My size is XL and I wear a size 6 or 7 US shoe. There are also three sizes bigger than mine. Typically when you buy patterns like this they do not come in a single pattern that fits over such a wide range. Usually your looking at buying separate patterns for children, women and men. So this pattern is on the more expensive side but IT IS AWESOME! I think this would be a great gift to anyone, or make them for everyone in your family. Really you will love this pattern.
I made these using a sherpa fleece (pictured below) and stretch quilted knit that I got from my favourite Canadian fabric shop Water Tower Textiles Canada. They are fully lined which makes them super cozy, especially if you use all warm materials. There is a left and right foot, which I love. I feel like it just makes the fit that much better. And the colour blocking adds to the look that really makes this pattern something unique. There is actually more colour blocking included in the pattern than I added to mine.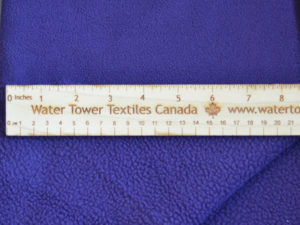
A few tips to pass on, that I made note of while sewing mine:
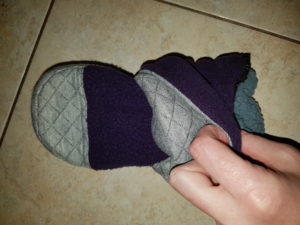
Keep in mind that I used very thick materials. The full thickness, when I was sewing together 4 layers of fabric, while attaching the leg band to the foot was about the thickness of my finger (see photo)! My overlocker is a champ though, the Juki MO644, and I had no issues getting through the layers.
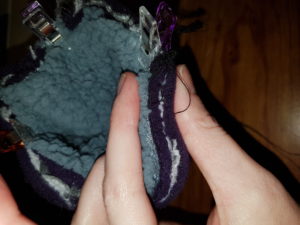
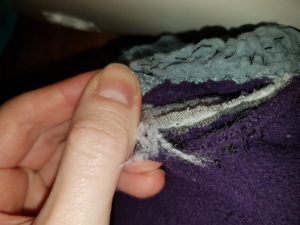
Make sure you sew through all the layers when you attach the leg band to your foot pieces. As I said above, I used thick materials. As a result I missed a few layers (see picture below) on my first try, and had to seam rip, which was a pain. I got it done though and I am glad I did it rather than being lazy, like I sometimes am when it’s something for myself. On the second one I took a bit of a larger seam allowance and didn’t have any troubles.
When sewing the leg band on, the instructions direct you to put the band inside the foot and sew it on that way. I found that difficult so I turned my band wrong side out, and put the foot piece inside it instead (see picture below). I found this made it easier to make the curve when I was sewing in such tight quarters.
Please note that I also altered the pattern by cutting my leg band at the top so that I could use a different fabric for the outer and inner of the band. I added my desired seam allowance and simply sewed it first and then treated it like a single piece as the pattern directs.
This pattern looks difficult but I was surprised that it didn’t take me overly long to complete at all, even with my seam ripping derailment.
Grab this pattern here, and make sure you don’t miss my post for the Lou’s Mittens pattern!